Tuesday, 17 October 2017
How to use canva to create great Pinterest images
Pinterest is one of the best free tools to bring traffic to your blog. However for it to work you need great images.
Canva is a fantastic free editing tool that allows you to create a variety of images including those optimised for Facebook, Pinterest, infographics and more. I'm only discovered Canva this year but I'm so glad I did, it has a range of templates already available that have the perfect dimensions to dominate Pinterest search results.
I will admit canva seemed a little tricky to get used to at first but once you know how it works it's a breeze. Here's my no nonsense guide to getting it work for you.
1. Once you've signed up head to create a design and click on Pinterest graphic - the dimensions will already be set up for you.
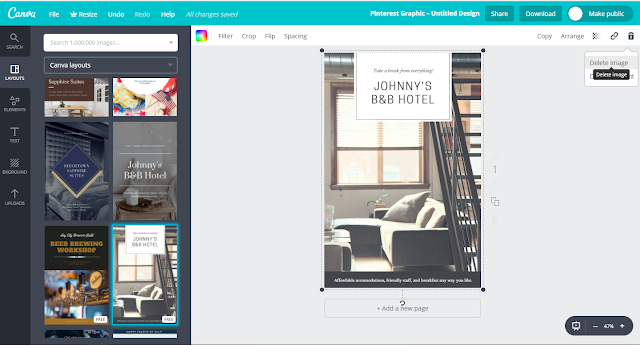
2. After selecting Pinterest graphic you'll be presented with a screen with a number of different options. The first tab you need to worry about is layout, there's a huge range of free templates you can edit from - there's no need to start from scratch.
Bear in mind a lot of these are pay but the free ones are easily identifiable with free on the bottom right corner.
3. Once you've selected your layout, you can then edit it. By clicking on the picture you'll be presented with a number of options including filter, crop, flip, spacing, copy, arrange, fade, link and delete.
If you don't want the picture that's in the layout simply head to the right hand corner with the trash can and click delete image. You'll then have a empty canvas to edit as you like.
You can add new pictures by heading to uploads and uploading the pictures you want to use. If you don't have any of your own there are plenty of free images available on Canva.
5. After changing the picture you may want to edit the text to. Simply head to text on the left hand column and you'll be presented with a large collection of different text designs.
A lot of text is often grouped on the sample images which can make it tricky to move things around. After clicking on the existing text, select ungroup and then click on the background. You should now be able to edit the text with ease.
6. If you don't like the colour scheme already set on the layout, click on the layout where you want the colour to change. The colour will appear in the top toolbar, click on it and you'll be presented with a table of colours. You can choose the predestined colours or click on the + to find your own.
7. Don't like the size of your text? It's really easy to change. Simply click on the text size on the top tool bar and select a size that you feel is more suitable.
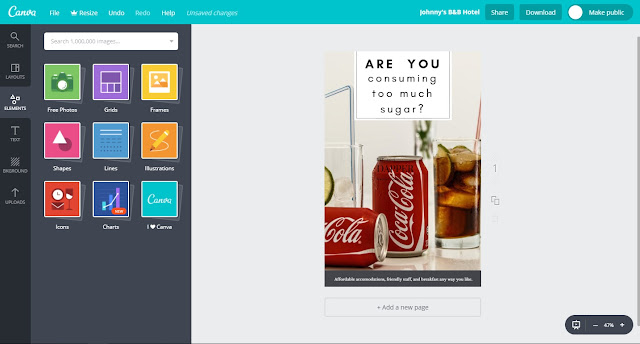
8. If you feel your layout needs a little extra something there's plenty of tools you can use - these are available in elements. You will find grids, frames, shapes, lines, illustrations, icons, charts and free photos which will bring your images to life.
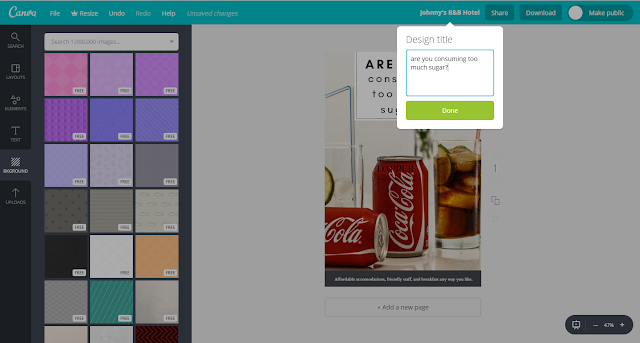
9. Not happy with the background on your layout? It's so easy to change. Click on the background tab and flick through the hundreds of free options. You'll find everything from pink checks to grey polka dot.
10. After finishing your design click on the top right toolbar where a title should already be filled out. Click on it and edit it to something that will suit your layout.
After changing the title click on download. You will be presented with a number of formats - Jpeg, Png, Pdf standard or Pdf print. I normally choose jpeg, it will then save to your downloads folder (or anywhere else you set it to).
That's it you're done. I hope you've find this guide really easy to use and do share with your friends if you think they'll benefit from it.
Subscribe to:
Post Comments (Atom)


No comments
Post a Comment